Imagine this, you’ve bought a shiny new monitor may be 28 inch or may be 32 inch with all the latest features and 4k resolution, or even 8k ! But little did you know before buying the monitor. Because all you have ever used is a 1080p monitor.
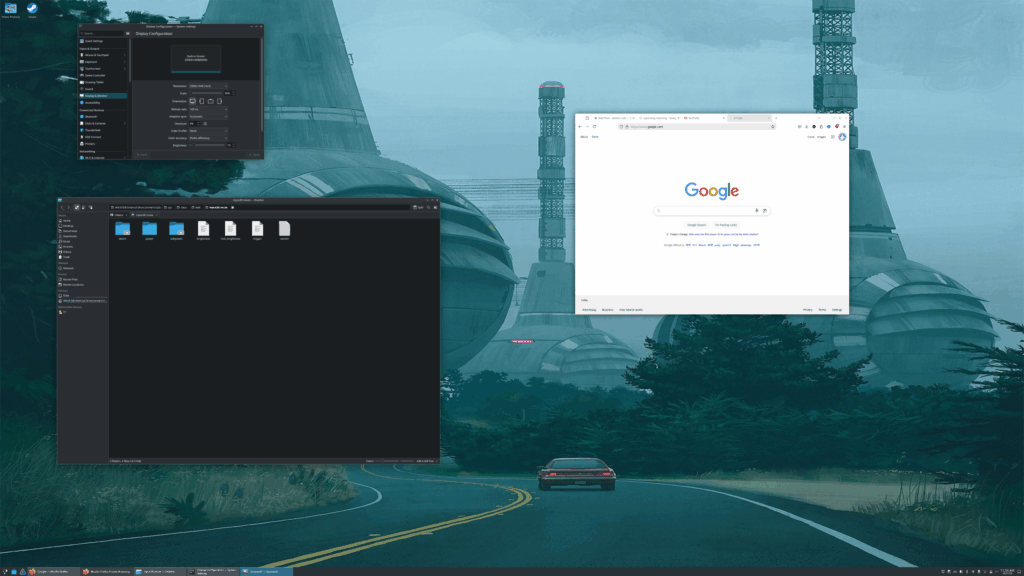
Now you have plugged in the monitor and turned your computer on like a happy little kid. But as soon as the monitor lit up, you discovered that you can’t see anything without squinting. Everything is so damn small ! The user interface, the fonts, the mouse pointer everything !!
Can you relate yourself with this penguin ? Good ! now read ahead.
I believe you’re using a desktop environment like KDE or GNOME. If you’re using a window manager like hyprland or i3 or dwm or something else, you already know a lot of advanced stuffs. So, this tutorial is not for you. You can figure out on your own !
If you’re using xorg, it will be easy for you. If you’re using wayland, it will be even easier for you. If you don’t know what wayland or xorg is, don’t worry, just run the following command in your terminal.
echo $XDG_SESSION_TYPE
As you can see I am running wayland. If you’re using xorg, you’ll see “x11” here.
If Wayland
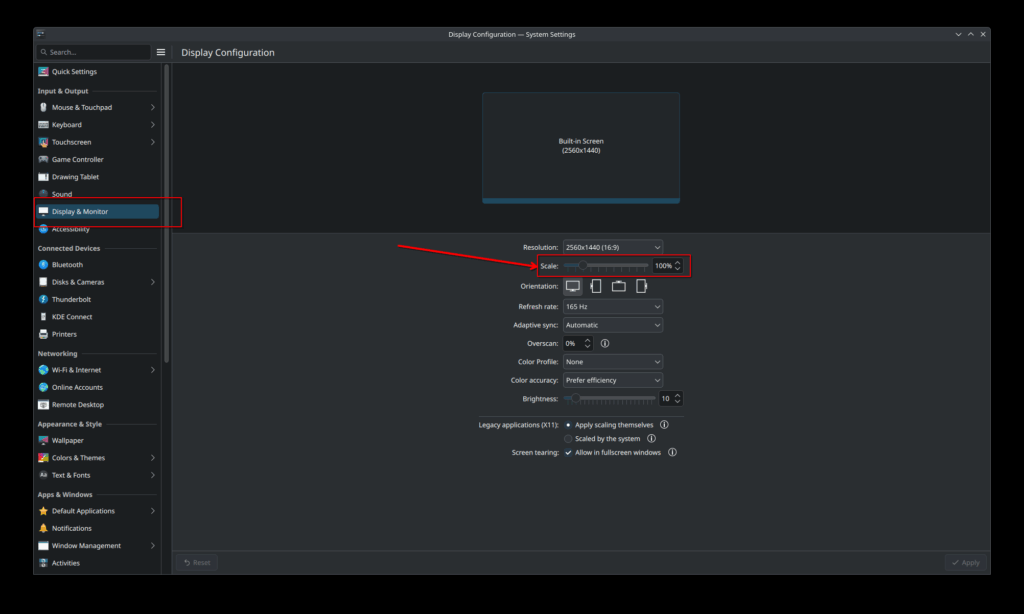
If you are using KDE, open “System Settings” and click on “Display & Monitor” on the left sidebar. And then change the value of “Scale” to something like 150%. Whatever suits you.
Your changes should be applied immediately. No need to restart.
If X11
X11 also has the same scaling option, but the thing is, it is by a “whole number”, and not by fraction. Meaning, you can scale by 200%. 300% and so on. If you’re happy with 200%, it’s fine. But, If 200% is too big and 100% is too small, then you’ll need 150% or even 125%. But, 125% or 150% means you’re doing “Fractional Scaling”. Fractional scaling is not supported in X11. Wayland is newer protocol, so it supports Fractional scaling.
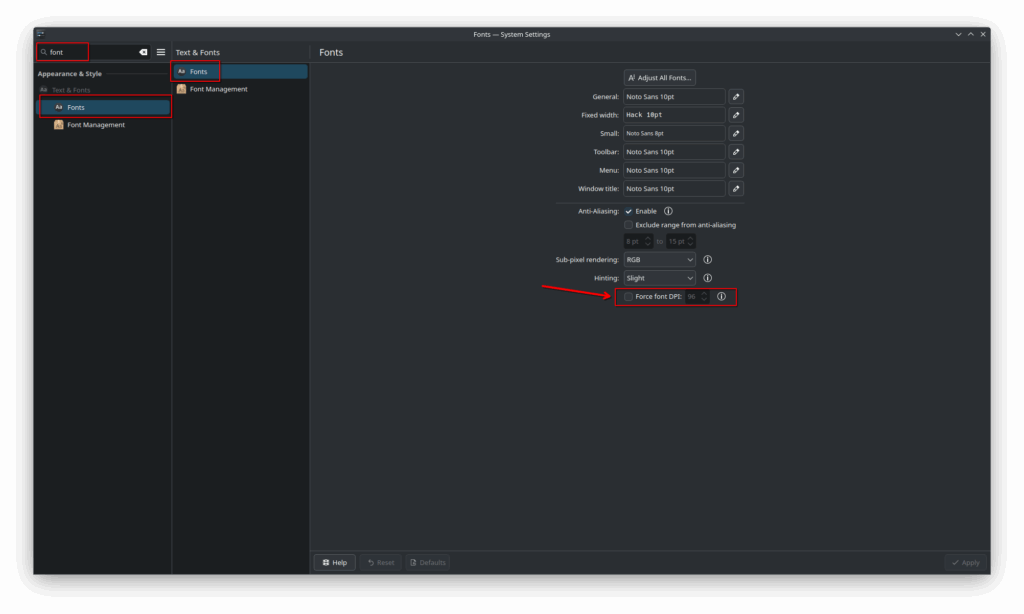
But worry not, it’s not the end of the world. For X11, we’ll change the “dpi” of the screen instead of doing the fractional scaling. Which will also work.
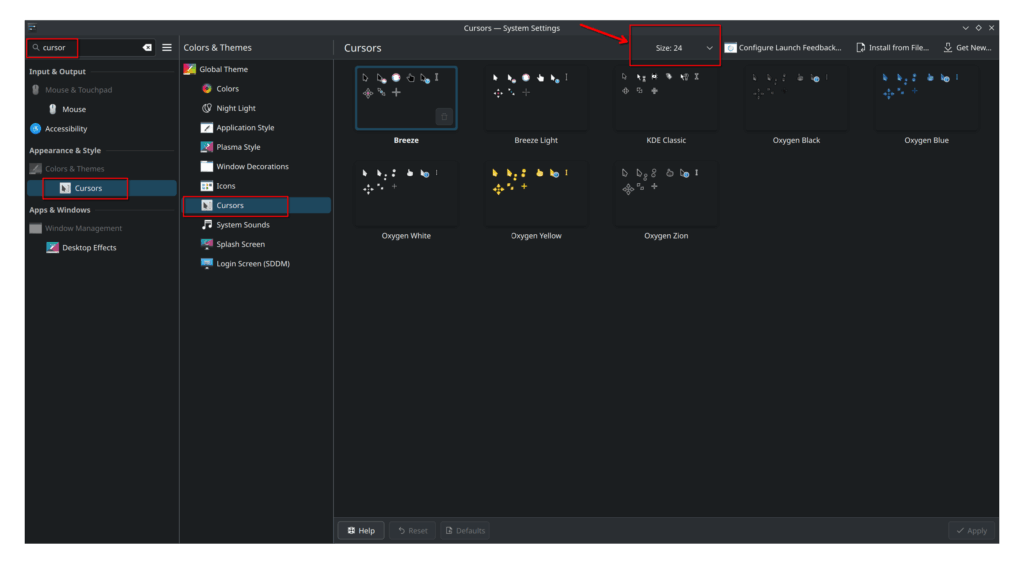
If you find the cursor is too small, change the cursor size from the cursor settings under “Global theme”.
Now, restart your computer to reflect all the changes you have made !
If you’re using any other desktop environment than KDE, the basic rule is simple, if you’re on X11, change the DPI from settings, if you’re using Wayland, change the scaling directly. But there are some distros which allows you to change the scaling in X11, for example Linux Mint. You can try that yourself and see if it works for you.
You know, with all the packages hanging out in the Arch User Repository (AUR), I thought I’d be cruising along smoothly. But, nope, this is Arch. It wouldn’t be Arch if I didn’t hit a wall where I had to pull something from a repository that wasn’t already enabled by default.
Enter the villain of this tale: the Steam client.
Now, even though my Steam Deck gets most of my love when it comes to gaming, there are a few games I just can’t resist playing on my Laptop (HP Omen 16). (Because let’s face it, sometimes bigger screens and higher frames per second are just too tempting.)
Steam, being its quirky self, wants the multilib repository enabled. Why? Because it loves 32-bit libraries, and Arch, being the ultra-modern, 64-bit hipster, doesn’t have them by default.
But hey, no drama. All you need to do is open up your trusty /etc/pacman.conf with your favorite text editor, un-comment a couple of lines, hit save, and run an update. Voila! Steam is ready to roll.
Nano is my go-to editor because I fear Vim. You can use vim if you’re brave enough ! Edit the following file:
sudo nano /etc/pacman.conf
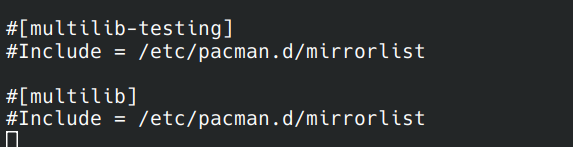
Look for the line which says [multilib], better search for it.
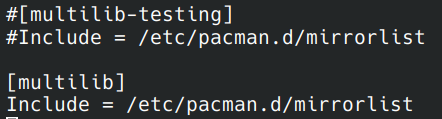
See the little ‘#’ there ? That means the lines are commented out so it won’t be effective. We will just remove the ‘#’ from there. Oh! and do it for [multilib] section only, not [multilib-testing]. Unless of course you’re a space engineer and knows what you’re doing ! Your computer might be on fire or your cat might die ! I don’t know.
Now, save the file. We use control + O to save in nano. Use !wq if you’re a Vim fanatic.
Now, refresh the cache
sudo pacman -Syyu
Do you see there are 3 progress bars ? One for ‘core’, one for ‘extra’ and one for ‘multilib’ which we just enabled.
Now you can install and use packages from Multilib universe. Install Steam by typing the following command!
This is a practice sheet for The following Video from Linux Command Line Journey Youtube Playlist. We would recommend you to watch the full video before doing this exercise.
1. Creating Directories
a. Make a directory called “playground” in your home directory.
Click for answer
cd ~
mkdir playground
b. Go-to the “playground” directory and create two more directories here – “dir1” and “dir2”
Click for answer
cd playground
mkdir dir1
mkdir dir2
c. Can you create the above directories using only 1 command ?
Click for answer
mkdir -p ~/playground/dir1 ~/playground/dir2
2. Copying Files
a. Copy the file /etc/passwd to the current working directory, i.e. ~/playground
Click for answer
cp /etc/passwd .
b. Repeat the above copy command with “-v” option
Click for answer
cp -v /etc/passwd .
c. Repeat the copy command with “-i” option this time. Notice any difference ?
Click for answer
cp -i /etc/passwd .
3. Moving and renaming files
a. Rename the “passwd” file you copied, to “fun”
Click for answer
mv passwd fun
b. Move the file “fun” to dir1
Click for answer
mv fun dir1
c. Move the file “fun” from dir1 to dir2
Click for answer
mv dir1/fun dir2
d. Move the file “fun” from dir2 back to “playground”
Click for answer
mv dir2/fun .
e. Move the file “fun” into dir1 again
Click for answer
mv fun dir1
f. Move dir1 into dir2 and confirm it with “ls” command
Click for answer
mv dir1 dir2
ls -l dir2
ls -l dir2/dir1
g. Put everything back
Click for answer
mv dir2/dir1 .
mv dir1/fun .
4. Creating Hard Links
a. Create 3 hard links of the file “fun”, and call it “fun-hard” and store in 3 places – 1. the same directory, 2. inside dir1 directory, 3. inside dir2 directory
Click for answer
ln fun fun-hard
ln fun dir1/fun-hard
ln fun dir2/fun-hard
5. Creating Symbolic Links
a. Create 3 symbolic links of the file “fun”, and call it “fun-sym” and store in 3 places – 1. the same directory, 2. inside dir1 directory, 3. inside dir2 directory
Do you use One Drive or Google Drive or any other cloud storage service ? How do you access your cloud storage ? Do you use a browser to access your cloud drive files ? Or you use a client software to mount your drive ? Like One Drive application or Google Drive for desktop. Do you use multiple programs to sync your cloud storage ? Those programs will keep running in the background and eat up your system’s precious resources. What is I tell you there is a better way to access your cloud storages all in one place with a. tiny piece of application ?
What is “rclone” ?
Rclone is an all-in-one command line tool to manage your files stored in the cloud storage. It is a better way to access all your cloud services than installing their individual client applications in your system. If you are a Linux user, chances are that your cloud service provider doesn’t even provide their client application. There are some third party tools available, for example “one driver” for accessing One Drive. But there are some limitations and of course it doesn’t support all of your cloud services. That’s where rclone comes into picture.
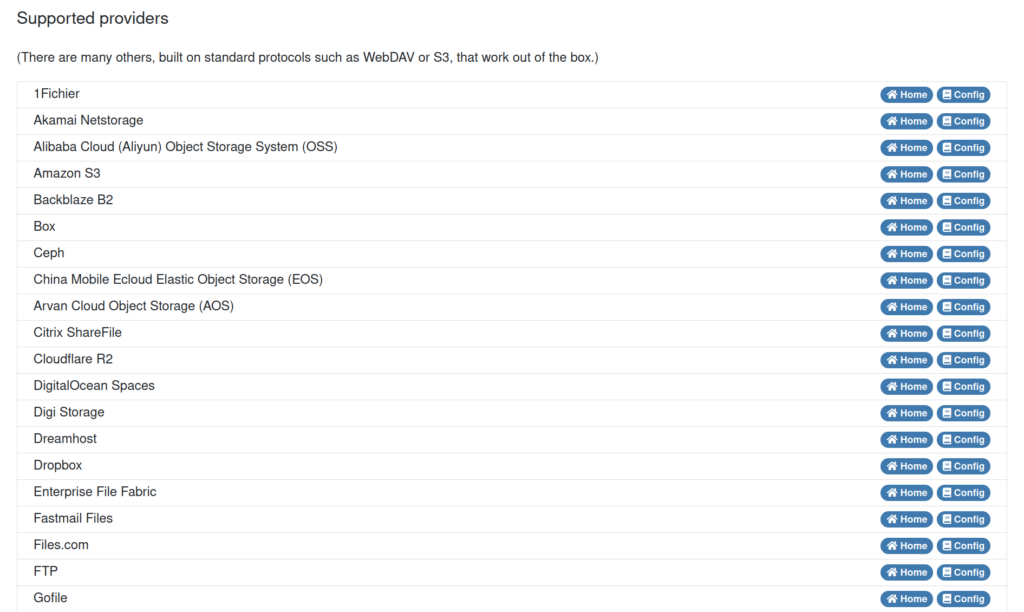
Which cloud providers are supported by rclone ?
As of writing this article, many many and many cloud providers are supported. Those are listed below:
1Fichier Home Config,Akamai Netstorage Home Config,Alibaba Cloud (Aliyun) Object Storage System (OSS) Home Config,Amazon S3 Home Config,Backblaze B2 Home Config,Box Home Config,Ceph Home Config,China Mobile Ecloud Elastic Object Storage (EOS) Home Config,Arvan Cloud Object Storage (AOS) Home Config,Citrix ShareFile Home Config,Cloudflare R2 Home Config,DigitalOcean Spaces Home Config,Digi Storage Home Config,Dreamhost Home Config,Dropbox Home Config,Enterprise File Fabric Home Config,Fastmail Files Home Config,Files.com Home Config,FTP Home Config,Gofile Home Config,Google Cloud Storage Home Config,Google Drive Home Config,Google Photos Home Config,HDFS Home Config,Hetzner Storage Box Home Config,HiDrive Home Config,HTTP Home Config,ImageKit Home Config,Internet Archive Home Config,Jottacloud Home Config,IBM COS S3 Home Config,IDrive e2 Home Config,IONOS Cloud Home Config,Koofr Home Config,Leviia Object Storage Home Config,Liara Object Storage Home Config,Linkbox Home Config,Linode Object Storage Home Config,Magalu Home Config,Mail.ru Cloud Home Config,Memset Memstore Home Config,Mega Home Config,Memory Home Config,Microsoft Azure Blob Storage Home Config,Microsoft Azure Files Storage Home Config,Microsoft OneDrive Home Config,Minio Home Config,Nextcloud Home Config,OVH Home Config,Blomp Cloud Storage Home Config,OpenDrive Home Config,OpenStack Swift Home Config,Oracle Cloud Storage Swift Home Config,Oracle Object Storage Home Config,ownCloud Home Config,pCloud Home Config,Petabox Home Config,PikPak Home Config,Pixeldrain Home Config,premiumize.me Home Config,put.io Home Config,Proton Drive Home Config,QingStor Home Config,Qiniu Cloud Object Storage (Kodo) Home Config,Quatrix by Maytech Home Config,Rackspace Cloud Files Home Config,rsync.net Home Config,Scaleway Home Config,Seafile Home Config,Seagate Lyve Cloud Home Config,SeaweedFS Home Config,SFTP Home Config,Sia Home Config,SMB / CIFS Home Config,StackPath Home Config,Storj Home Config,Synology Home Config,SugarSync Home Config,Tencent Cloud Object Storage (COS) Home Config,Uloz.to Home Config,Uptobox Home Config,Wasabi Home Config,WebDAV Home Config,Yandex Disk Home Config,Zoho WorkDrive Home Config,The local filesystem
Unfortunately iCloud doesn’t support rclone yet, as usual. Typical Apple mentality I’d say !
How to install “rclone” ?
Installing rclone in linux is very easy. Just use the commands pertaining to your distro and package manager.
Debian or Ubuntu based systems – Linux Mint, Pop!_OS etc
sudo apt install rclone
Arch based systems – Garuda, Artix, Manjaro, EndeavourOS etc
sudo pacman -S rclone
Fedora based systems – Rocky Linux, CentOS etc
sudo dnf install rclone
For other Linux systems or Unix System (Like FreeBSD), go to the Release section of the github project page of rclone and download accordingly, or build from source by following the instructions in the rclone github page:
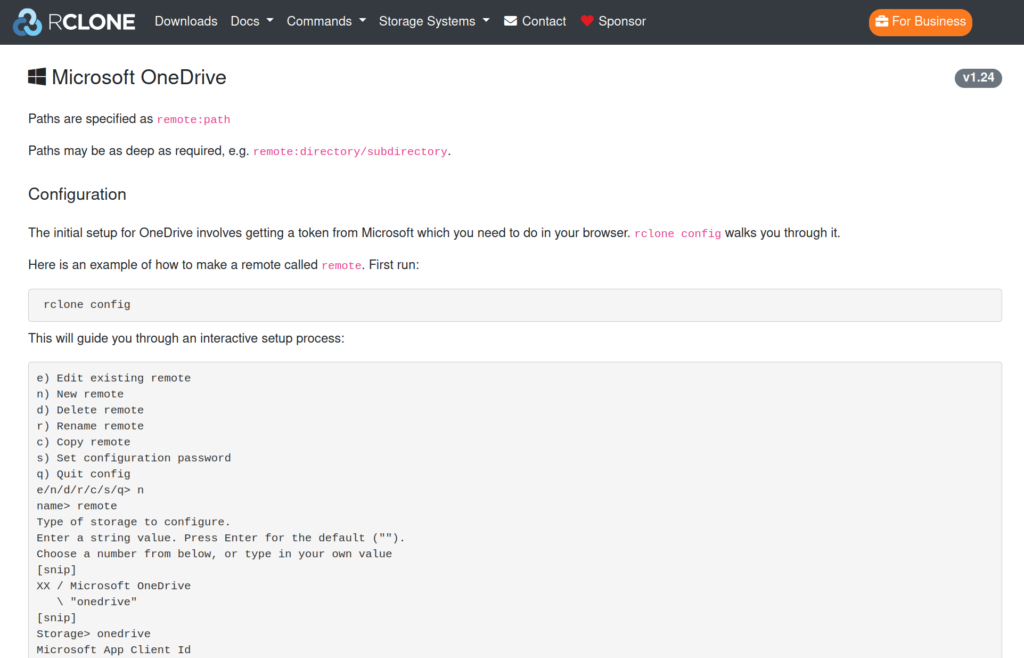
After running the above command, it will show you like this:
The options are self explanatory. Press (n) to create a new remote, press (s) to set a configuration password so that no one else messes with your config.
We’ll choose the first option – (n) New Remote
Now, we’ll give it a name. Any name you want. For example, if I am configuring One Drive, I’ll put “onedrive” here, without the quotes like this:
It’s better not to put any spaces in between, because that could complicate things at a later point of time.
Now, when you press enter, you’ll see a lot of options. And I mean a lot. As of writing this article, there are 46 options here !
Now, you’ll be asked client_id. If you do not know your client id that’s fine. You can proceed without it also, in that case rclone will use the default client id. The default client id might give you slow download/upload speeds. So, it’s better to use your own client id instead.
How to create your client id and client secret key and determine your cloud specific configuration ?
To get your cloud provider specific settings, open rclone website from below link:
See the “Config” buttons on the right of each entry ? Find out your cloud provider and click on the “Config” button and you’ll be presented with the configuration page for that particular cloud provider.
Now, all you need to do is to follow along the instructions to generate your client id and client secret for your cloud provider and keep it handy with you. You’ll need it in the next step.
Now, in the following screen, enter your client id
Then press “Enter” and similarly, enter your client secret when prompted
Again, these are optional steps. If you don’t have the client id and client secret, it’s absolutely fine too.
Now, it will prompt you to select region
Most of the cases, option 1 is all you want. Because you can already guess that the other 3 options are not for most of us users. Except who are from Germany. Then it’s option 3 for you.
No, I do not want to edit advanced config. If you want to explore, it’s fine. Otherwise just press “Enter” without selecting anything because it’s “no” by default.
Press “Enter” in the next screen. Auto-config should be sufficient for you if you are using a GUI desktop like XFCE or KDE or GNOME or any other Desktop Environment, you will get an authorization screen like this:
If it doesn’t open your browser automatically, see the link in the console which starts with http://127.0.0.1:53682 as shown in the below screenshot ? copy the wholeurl and paste it in your browser.
Then, after you login to your Microsoft Account, you’ll get this success screen.
If you are not using any Desktop Environment or you’re connecting to your Linux system with SSH, you need to select the “Headless” option. So, in the “Autoconfig” screen, select “No” and you’ll get the following screen
As you can see from the instructions on the screen, you need to go to your other machine which has a browser installed and also rclone should be installed on that 2nd machine. Then copy and paste the command written on the console like this:
It will ask you to login to your Microsoft account, and after Login, you’ll get this screen:
Click “Continue” and you’ll get a “Success” screen like before:
Now, you’re not done yet, check the terminal on your second machine, you’ll see a code there which will look like this:
Copy the code and paste in your first machine where it was asking for the “config_token”:
Press “Enter” and you’ll see the below screen
Select option 1. That should be applicable for almost everyone.
Select option 1 again
Press “Enter”. By default it will select “Yes”.
Press “Enter” Once again, so that all your changes are saved now.
Now, we can see our “onedrive” remote is showing. If you’re using any other cloud provider, the steps should be more or less similar, unless you are a very advanced user. In that case you’ll not need this tutorial anyway.
Step 3 – Mounting the cloud drive
Now, we’ll mount our cloud drive to a folder so that we can access it easily. Let’s see how to do that.
First we’ll create the directory where we will mount our cloud drive.
mkdir ~/onedrive
You can mount it wherever you want.
Now, we’ll use the following command to mount our onedrive.
rclone mount onedrive: ~/onedrive
As we can see our onedrive is mounted and the cloud files are showing.
But, there is a catch, your terminal is still running, and if you close the terminal, it will unmount your onedrive as well.
So, we need to run this in the background. It’s very easy. Just put a “&” at the end of the mount command.
rclone mount onedrive: ~/onedrive &
Now, it will keep running in the background.
Step 4 – Troubleshooting
If you get the following error:
You can try to unmount the existing drive with the following command
fusermount -u /home/qube/onedrive
If the above command fails to unmount and gives any error like this
Use the –allow-non-empty flag while mounting like this:
rclone mount onedrive: ~/onedrive --allow-non-empty &
If you are getting this following error:
Make sure to own the directory. To do this, use the following command
sudo chown qube:qube /home/qube/onedrive
Replace my username “qube” with your username and my group name “qube” with yours. Also, check the mount folder name as well.
To Kill all rclone processes, run this command
pkill -f rclone
That’s all you need to configure rclone in your Linux system. Let me know in the comments section if you’re facing any issues.